http://www.blogger.com/

Monday, May 30, 2016

Make It Monday - So cute, they'll be jelly!

LOL! Here's a fun and simple centerpiece you can make for your ocean theme parties this summer!


Whimsical jellyfish made from some very basic supplies.

 
Take a Styrofoam ball and cut it in half. For the sample, we used 3" and 4" Styrofoam balls.


To get the jellyfish shape, you will need to round the edges. To do this, just hold the Styrofoam and press the edges into the table surface. It will"smash" the Styrofoam. Continue to press the edges against the table while rotating the half ball.

 
The edges will end up with a rounded look.


Sponge paint the entire Styrofoam piece with a mixture of blues, greens and purple acrylic paints.


While the Styrofoam is drying, cut some opalescent cellophane, curling ribbons and 6" green and blue glitter tulle into strips about 1/2" x 10" long for the jellyfish "legs". Carefully make small holes at the bottom of the Styrofoam jellyfish and glue in one end of the strips. Randomly place the different types of strips all around. Trim the strips if needed.


Add two moving eyes to the top of the jellyfish. The sample used 24mm eyes. Take a thin 1/8" wood dowel and stick one under each jellyfish.


To create the centerpiece, fill a low glass vase with green and blue marbles. Stick the jellyfish in the marbles. Add a few pieces of greenery. You can also add a t-lite buried in the marbles to create a glow effect.

Thanks you for stopping by today and I hope you enjoyed your weekend!

Monday, May 23, 2016

Make It Monday - Folded Money Frog!

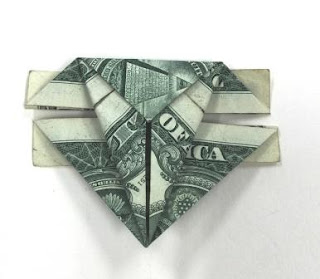
Graduation season always makes me think of money...money roses, dollar bill butterflies, money origami hearts and everyone's favorite good luck symbol, Frogs! So, this week's Make It Monday is a refresher for those of you who may have forgotten how to fold one!

As with all money origami, it's best to use clean and crispy dollars. For the frog, start with the face side of the dollar bill up.


 Fold  it in half. Crease well and unfold. Take the right bottom edge and fold up along the center line. Crease well.
 

Take the left top edge and fold down along the center fold line, meeting the other side. Crease well and unfold.


Now, take the left bottom edge and fold up along the center, meeting the other side gain. Crease well. Unfold the right side.


Now, take the top right edge and fold down along the center line, meeting up with the left side. Crease well.

Unfold both sides. You should see an X on each side.

Turn the bill around so that now it is vertical. Carefully push the sides in; it should easily fold down if you creased the X well.


Fold the straight edge up, like a sailor hat. Crease well.


Repeat with the other side.
 

Turn the piece over.


Lift just one layer and fold in side to the center, forming a triangle. Crease well.


Repeat with the other side. Fold the top down and crease well.


Unfold the sides.
Open up the little pocket on either side of the top triangle. Tuck the top of the side triangle into the pocket.

Repeat with the other side triangle. Crease well. this is the top of the frog's body. The pointy side is the head. Flip the frog over.

 
To create the legs, fold out at an angle from the center point all four corners.
 

Frog with all of the legs folded out.

Your Money frog is all done!


You can make a bunch and slip them into poly tubing to make a lei or use removable tape to add to a card.

When I first learned how to fold this frog, I would practice making them and leave them as part of the tip when I ate out. It was a great conversation starter, too!

You can make them hop by holding down the "butt" end and letting go. A good frog will hop and not flip over.

Thanks for stopping by today and I hope you have a "toad-ily" awesome week!


Monday, May 16, 2016

Make It Monday! Easy Card Attacher

Sometimes, you work so hard on your handmade card that you wish everyone could just see it all the time! So, why not just skip the envelope and have your card attached to the front of the gift bag? Today's Make It Monday shows you how simple this is to do! We even have a project sheet here.

First get your gift bag, so you know how large your card can be. Then, make your card keeping the following in mind:


The card will be "hanging" from the holder so the folded edge of the card should be along the top of the card, no matter what the design orientation is. The width of the card should be at least 1 inch smaller then the bag's width and its height should be at least 2 inches shorter than the bag.


After you make the card, cut a strip of card stock at least 2 inches tall and 1 3/4 inches longer than the width of the card.


For example, if your card is 4 inches wide and 6 inches tall, your card stock should be at least 2 inches tall and 5 3/4 inches long.


You can use a craft knife with a metal edge ruler for the next step or a Fiskars Sure Cut paper trimmer. This paper trimmer has a wire cutting guide so you can measure and cut where you want in one step! Lay the card stock down in front lengthwise. Measure in  3/4" from each side and 1 inch down from the top. Cut a horizontal slit at this mark.
 
 
Then, measure down another 1/4 inch and cut another horizontal slit.
 
 
Cut the two sides between the slits to create a 1/4 inch tall slot. The slot will be 1/4" longer than the card's width to make it easier to slip the card on and off. You can now use a decorative edge punch, scissors or dies to add interest to the top edge. Or you can just round all four corners. Put double stick tape along the top 1 inch section.
 
Center the piece onto the front of the gift bag and tape down. Slip the card into the slot and you're done!

Thanks for stopping by today and hope you're having a start to an awesome week!

Sunday, May 15, 2016

Joy of Crafting Second show for May!

May is just going by so fast! But maybe if you're still in school, not fast enough?! Anyway, it is time for a new show with more fun crafts!


Our first guests are from the Hawaii State Public Library System. We welcome Mary Okinaka and Tina Takamoto. They fill us in on this year's Summer Reading program.


Tina, the Aiea Children's Librarian shows us how to make one of the reading incentive projects, a Monster bookmark!


Then, we  have Joel Kutaka from Celebrations who shows us how to make a cool dashboard for your planners. He also gives us some tips on decorating your planner pages.


We close the show with a super cool project done by Erika from our Pearl City Ben Franklin Crafts! Erika shows us how to use foam core board to make an amazing party card box that looks like a giant book!

Thanks for stopping by today and I hope you get a chance to catch the show! Happy Crafting!

Monday, May 9, 2016

Make It Monday! Art in Motion!

Do you remember Flip books? Well, I thought with stop motion videos getting popular again, a flip book would be fun to make! Especially when you use rubber stamps for the image! Here's a project sheet  to make one. Or, you can follow the steps below...

First, you need to make the book. Since you will be stamping and coloring, you want to use paper that will withstand the inks but you still need it to be thin and flexible enough to "flip". I used marker paper for my book.The marker paper was 9" x 12" so I cut it down to 3" x 4.5" pieces for the pages. I got about 32 pages together. Make sure that the 3" edge that will be flipped through is all neatly aligned. Then, staple the other end to make the book, about three staples. The cover will be added later.

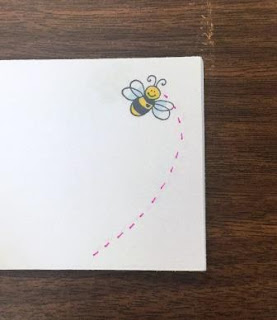
For the stamp, choose a design that lends itself to animation, like this dandelion design bee design.


Take a scratch paper the size of a page and stamp out what the final design on the last page would look like. Then, stamp the complete path the animation would go. You can also draw in a line with arrows to show the direction.


Now to start stamping! Stamp from the last page in the book and go backwards. Place the designed scratch paper behind the last page and use it as a guide to where to stamp.


Continue following the path of the design "backwards" and stamping on each page.


You should be able to see the previous stamped design when you turn down the next page. Use that as a guide to where to stamp.

After you have completed the stamping, go back and color in the design with makers or colored pencils. Put a scratch paper behind the page before coloring so the markers do not bleed through.


For the cover, cut a cardstock 3" high and 9 1/4" wide. Score at the 4 1/2" and 4 3/4" points to create a spine. Put a couple of lines of Meriken double stick tape along the spine and tape the book in place. decorate the cover as you like.

Thumb fan the pages a couple times to break in the pages and get them used to being flipped. Then enjoy your little homemade old school "video"! Check out the video at the Joy of Crafting Facebook page

Thanks for stopping by today and have a Crafty Week!

Monday, May 2, 2016

Make It Monday - Spammy the Frog!

Okay, there are people who won't eat Spam but they will eat Frog's legs? Well, I know all the Spam lovers were probably checking out the Spam Jam this past weekend in Waikiki. And, I bet there's a lot of empty Spam cans from the event! So, this week's Make It Monday salutes last month by honoring both Spam and Earth Month with a recycled Spam can...


Meet Spammy the Frog! A cute container you can use for a party favor or small centerpiece. And yes, we have a project sheet which you can find here . So, let's hop to it!


First, clean your empty Spam can and make sure it's dry before you start.

 
Take a 3 1/8" x 11" printed cardstock to line the inside of the can. Add double stick tape to the top and bottom of the wrong side of the cardstock. Place the cardstock inside of the can and tape down, overlapping the edges. The cardstock should be tall enough to cover the edge of the can so there isn't anything sharp.


Take a 2 7/8" x 11" green cardstock and wrap it around the outside of the can and tape in place.


Use punches to make the eyes. Punch out two green 2 " circles for the eyelids and two 1 1/2" white circles for the eyes.


Take the 1/4" hole punch and punch out two holes in black cardstock about 2" apart. Use the 1" circle punch and punch out a circle over each of the 1/4" circles.


Take the black circles and tape to the white circles. Next, use pop dots to tape the white circles to the green circles. Use Pop Up glue dots to glue the eyes to the top edge of the can.

 
Use a Black marker to draw a smile on the can below the eyes. Punch out two 3/4" pink circles. Place one each at the end of the smiles for cheeks.


Fill the can with wrapped candy/treats! Leave as is for a small centerpiece or place inside of a clear cello bag and tie off with a ribbon to use as a gift. or favor.

Thanks for stopping by today and I hope you have fun making Spammy or other critters with empty cans!