For this week's Make It Monday project, I was inspired by Easter. Well, more specifically, Easter Candy! And what do you see everywhere? Peeps! Those bunny shaped ones have taken the lead as the most popular shape. And all those colors! And now, I even see different flavors, too!
Well, for these little bunnies, you won't have to worry about adding any calories. They are simply made from felt. And you can switch the paperclip for a pin back or magnet if you so desire. So, here's how to make it into a planner clip:
Trace and cut out the pattern , which you can find on the
project sheet. . Cut two bunnies from the felt.Take one felt bunny and use the end of a thin paintbrush and make dip dot eyes and nose with dark brown paint.
Take the other bunny and make a small horizontal slit in the body for the paperclip. Now, there are two ways to finish the bunny. You can glue them together or you can try your hand at stitching them together. If you are just going to glue them together, then slip the paperclip top into the slit.
Add a little glue to hold in place. Put the two bunnies together and glue. Gluing is faster and you'll be able to multiply those bunnies in no time!
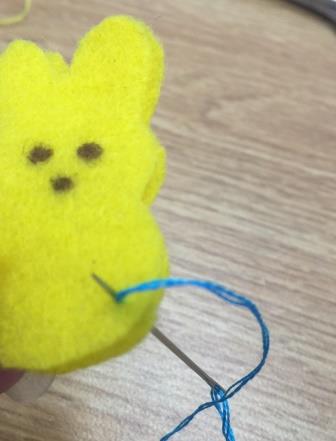
If you are going to stitch them together, take both bunnies and place them together. Use a matching color of embroidery floss (two strands) and blanket stitch around. I am using a contrast floss color so you can see the stitching better. First, thread your needle, knot one end and come up from behind the top layer bunny, the knot will be hidden between the two layers.
Now, put the needle through both thicknesses and come up from the bottom and go through the same hole, coming out on top.
Slip the needle through the loop around the edge.
Poke the needle through both thicknesses, from the bottom up about 1/8" away from the first hole. Pull floss.
Continue stitching all around the bunny. Knot securely and cut off the excess floss.
Then, add a little glue to the top of the paper clip and slip inside the slit on the bunny in the back. Stitching takes a little longer but adds a nice finish.
Hope you have fun making these bunnies! Happy Easter, Happy Crafting!


ADORABLE! I'm not a fan of eating peeps, but totally love the look and whimsy of this!!
ReplyDelete