http://www.blogger.com/

Monday, April 25, 2016

Make It Monday! Make You Smile!

Last week, we wanted to add some cheer with our felt sunflower. This week, we want to add some smiles with a simple faux terrarium! It's so easy to put together! We even have a project sheet !

 
First, pick some fun stamp critter designs that you want to inhabit your little world. Here, we stamped and colored some of dandelion designs' cute pandas. Carefully cut them out leaving a little border and set them aside for now.


Take a piece of floral foam or in this case Styrofoam and cut to fit the mason jar you are going to use. Cut apart some greenery bush and stick into the foam to create your little "forest". Glue them in if necessary.


Cover the foam with reindeer moss. making sure to get in between the plants.


Now, take your stamped images and place them within your plants. Use a little glue to hold them in place.


Take the whole piece and place it inside of the mason jar. Add a little more moss around the edges if necessary. You can add in firefly lights, too!


Punch out a 2.5" circle from a scrap of cardstock and write "Smile!" on a it. Tape to the jar lid.


Share this with a friend to bring some smiles or keep it on your desk to brighten your day! Thanks for stopping by today! Have a Happy Crafty week!


Monday, April 18, 2016

April's second show!

Now, that you're done with your taxes, it's time to craft! And what better way than to try something new that one of our creative guests show us...

 
Our first guest, Bette Kalohi, is new to the show and has a great craft to share!
 
 
 Bette and her friends raise butterflies. Sometimes, those beautiful creatures do not make it. So, Bette takes their wings and makes jewelry from them to perpetuate their legacy. Her technique is similar to using pressed flowers.


Next, our favorite chef, Derek Kurisu of KTA Superstores is back with a great idea for graduates heading to college on the mainland. What better way to chase away the homesick blues than with a Spam Musubi! You need to see how he puts this local treat together!


We are so honored to have our last guest return to the show. Kuana Torres Kahele has "Making Lei 2" DVD coming out in May and we get a sneak preview of one of the new leis!

Kuana shows us how to make a beautiful shell lei using inexpensive shells. Kuana is also returning to our stores for free demonstrations starting on Thursday, May 12 at our Enchanted Lake store. Be sure to check with your favorite HouseMart Ben Franklin Crafts store to see when Kuana will be in your neighborhood.

Thanks for stopping by today and I hope you're having a great week!


Our first guest

Make It Monday - Sunflower Hoop


Administrative Professional Day is Wednesday, April 27! why not make a cheerful sunflower to brighten a cubicle?! Or, you can make this easy decoration for Mother's Day, a birthday basically, any occasion! You can get this week's Make it Monday project sheet here.


You can use any size wood embroidery hoop, you'll just have to enlarge the petals and leaves. For the sample, I used a 3" hoop. Separate the inner and outer hoops. If you want, you can paint the hoop rims but it is not necessary.
 

Place the brown felt piece over the inner hoop. Place the outer hoop back on, stretching the felt taut. tighten the screw to secure.
 
 
Trim off the excess felt on the back.
 
 
Trace and cut out 14 large petals from the yellow felt and 14 small petals from the gold felt. Run a line of glue along the straight edge and gather to form the petals.


Start with placing one large yellow petal in front of the screw and glue to the hoop outer rim. Glue the rest of the petals all around the hoop.
 
 
Place the small gold petals in between the larger yellow petals and glue to top of the hoop rim.


Glue all of the gold petals onto the hoop.
 

Thread the sewing needle and sew a running stitch down the center of the 7/8" satin edge sheer ribbon.


Gather the ribbon to create a ruffle.


Glue the ruffle around the edge of the gold petals.
 

You can use readymade buttons or paint some plain wood ones with brown acrylic paint to match the felt.


Glue the buttons onto the center brown felt for "seeds".


Cut the green felt in half. Take one of the halves and fold it in half.
 

Curve cut the edges to shape into leaves.


Like the petals, run a line of glue along one end and scrunch to make a leaf. Place two leaves behind the hoop and glue in place. Tie a piece of jute to the screw for a hanger.


Give your sunflower away or hang it in your own cubicle to brighten your corner of the world!

Thanks for stopping by today and may your week be filled with Sunshine and Smiles!


Monday, April 11, 2016

Make It Monday - Midori Traveler's Style Notebook

It's the start of another week and time for Make It Monday! I know for a lot of you, planners help you stay on top of all the things you HAVE to do and even the things you WANT to do. One popular style is the Midori Traveler's Notebooks. These consist of a bunch of individual notebooks held together in one cover. The system allows you to switch out notebooks with ease. I use this system and I like the idea of being able to have individual notebooks for different things. For instance, I have one set up to keep track of my reading for this year.

Midori sells a lot of different notebook inserts but it's so easy to make your own, too! Here's some easy steps...


Determine the size you want to make. In this case, the notebooks are 4.25" x 8.25", similar to the regular Midori size. Choose a double sided scrapbook paper. This is a great way to use up your stash!
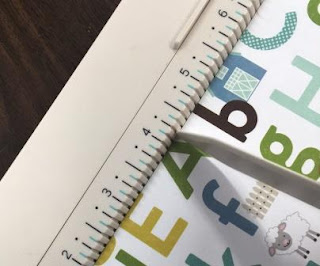
Cut the cardstock 8.5" W x 8.25" H. Place it on the Martha Stewart Score Board with the 8.5" edge along the top. Score at the 4.25" mark.


Do the same for the paper you chose for the inside of the notebook. You can use copy paper, drawing paper even watercolor paper. It all depends on what you want to do with your notebook. The thicker the paper, the less pages you will put in the notebook to keep it from being too bulky.


Take the cardstock and place it on top of the stack of "pages" and align edges. TIP: You can use small binder clips to hold the papers together when stapling. Place the stack onto an old magazine or stack of newspapers. Position the stapler to staple onto the scored middle line.


Staple at least there places: one in the center, one at the top and one at the bottom about 1" away from the edges.


Fold the notebook closed. If you want, you can use the WeR Corner Chomper to round the corners.

Thanks for stopping by today! If you want, we have a project sheet on our website. Now, go make some, I know you're probably thinking about all the different notebooks you could use! Happy Crafting


Monday, April 4, 2016

Make It Monday - Twinkie Hula Girl!

Today's Make It Monday project is really sweet!  Wednesday, April 6 is National Twinkie Day! While I'm not a super Twinkie fan (I prefer Hostess Cupcakes) I do love them as a cake decorating surface! Back in the day when I was teaching Wilton Cake Decorating, Twinkies were a fun way to practice our skills without having to bake a cake. Being from Hawaii, one of my favorite designs was the Hula Girl made with the banana Twinkies they used to make, those had a nice warm brown color.


Here's our 2016 Hula Girl Twinkie! We also have a project sheet on our website.


Make some icing or use the Readymade Wilton Decorator Icing in white.


Use the Wilton Icing colors to make the different colors you need. Don't use food coloring, it has too much liquid and can alter the icing consistency.The best way to add color is with toothpicks. Poke a toothpick through the foil wrapper and get some color on it.


Stick the toothpick into the white icing and stir. Always use a clean toothpick to add more color.


I like to start with the hair first. For the hair, I mixed up a little brown icing and I used the  #47 Basketweave  tip to make some beautiful wavy hair. Use with the serrated edge facing up to get the line texture. TIP: For better coverage, you can spread a little icing on before piping the hair on.

Make the hair as long as you like, styled as you want, have fun!


For the body, I used the #47 Basketeweave with green icing to make the grass skirt. You can use other tips like rounds or even #233 Grass, test to see how you want the skirt to look.Starting from the midpoint of the Twinkie, I make rows of the green strips around the Twinkie.


Next, I used the #5 Round tip to make two white dots for the eyes. A little later, I will add a dot of black gel to the center for the eyes.


I also use the #5 tip and white icing to make two patches above the skirt for the coconut bra.


You can make large icing circles in brown but I like to use Whoppers for the coconut bra top.
The icing helps to hold them in place.
.

The finishing touch is make a lei around the neck. Use a Star tip to make a ruffle around the neck for a lei. You can also put a flower in her hair. I used #18 Star tip.


I added a finishing touch to her skirt with a ruffle of green at the top using the #18 Star tip, like the lei. Now, your Hula Girl is ready to celebrate! Hau'oli la Hanau, Twinkies!

Thanks for stopping by for this week's Make It Monday! Happy Crafting!