


Start by matching up the size of your flower with a plain wood bead or ball. For my fairy, I'm using those beautiful but inexpensive rose bushes in the stores and I found the 1" wood ball with the hole on the bottom would work.

Pull off a flower head and the leaves from the stem.

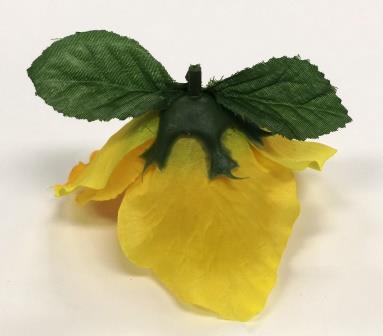
Pull off the stem and small calyx from the leaves.

Next, you will add the wood ball to the top of the calyx for the head. TIP: When looking at the wood ball, do not use the side of the ball with the circular wood grain for the face. If you do, when you add the eyes, it could end up looking like a little "piggy" face, the circles creating a snout.

Instead, use the side of the ball that has the wood grain lines going vertically up and down. It makes for a more pleasant face.

Glue the wood ball on top of the rose. If you are using a wood ball that doesn't have a hole at the bottom, trim the stem of the rose as close as possible and glue the ball right on top of the calyx.

For the hair, wrap jute twine around a 3" wide scrap of paper about sixteen times. Bundle and tie together in the middle with another short piece of twine.

Cut the loops apart. Make a shorter bundle of about 8 loops for the bangs, cut the loops apart, too.


Add a pin back to wear your Flower Fairy or glue on a magnet. Place her in a fairy garden setting or a terrarium. You can also use her as a topper for a party favor. There's many ways you can use your Flower fairy to brighten someone's day!
Hope you have fun making your own Flower Fairies and if you need, we have a project sheet available, too, right here.
Thanks for joining us today and stop by next week for another Make It Monday!


Absolutely adorable! Love how you did it - especially that cute haircut. I can imagine these in my little garden.
ReplyDelete