http://www.blogger.com/
Showing posts with label card making. Show all posts

Monday, March 28, 2016

Make It Monday - Standing Spinner card

I've always loved making spinner cards, there's just something fun and magical when they spin! Before it was cumbersome to make the cut-out windows either by hand or you were limited to positioning if you used a punch. Well, thank goodness for dies! Now, placement is not a problem and there are shapes galore! We have a project sheet to make this card, but here are some of my additional tips.
 

Cut four pieces of cardstock; in this case we used a standard card size of 4 1/4" x 5 1/2". If you are using a printed cardstock, pay attention to the direction of the printed design, you want to make sure that the cardstock pieces are in the 5 1/2" tall and  4 1/4" wide format. Score each piece vertically down the middle at 2 1/8".


It's easier to use a nested set of dies so that you can use two sizes of the die and know that the window cut-out and the spinner will match. I used the two on the bottom from the set.


To make sure that all of the windows will be in the same place, make a mark 1" down from the top at the middle. I folded the cardstock at the scored line and used the score board to measure.


Place the top of the larger die at that mark and center the die over the scored middle line and cut out. Repeat with the other three pieces.

 
Take the same die shape and go one size smaller. Die cut two for the spinner.


Take one piece and lay a length of beading thread down the middle, leaving tails hanging out from the top and the bottom. Tape down securely. For this, I use the shiny cello Scotch tape because it has a stronger hold, not the "magic" one that is meant to be easily removed.


Double stick tape the two spinner pieces together. You can decorate the spinner now or later.


Now, place the spinner inside one of the window cut-outs. Center and tape the beading thread down along the center scored line; keeping the thread taut. I like to turn the thread tails at an angle and then tape again to make it even more secure.


Take another of the window cutouts and add double stick tape all around one half on the wrong side. Align the window and edges with the first piece and just tape down that one half. Repeat with the other two pieces until you have taped all four pieces together and have formed a "+" with the spinner hanging in the middle of the windows.
 

Before putting the card inside of the envelope, it is fun to wind up the spinner first. When the card is pulled out, the spinner will spin and there will be the added element of surprise!

Have fun making these for all kinds of occasions, especially for co-workers so they can prop them up on their desks for everyone to enjoy! Thanks for stopping by for this week's Make It Monday and Happy Crafting!


Sunday, January 17, 2016

More Crafting in the New Year!

It's time for a new show and we have some fun crafts to share!
We start the show with Desiree Somera from #HIHO, Hands In Helping Out. Desiree explains how HIHO helps connect people who want to volunteer with groups in need in their communities. Volunteering more would make a great New Year resolution!

Desiree and I do some crafting making some beautiful Mahalo cards using the #Heidi Swapp #Minc
foiling machine. Super easy and super fun!

We're getting ready for Valentine's Day and Lynn Hashino from Mapunapuna  has an awesome earring project! And even more, she shows us a technique to making the wire shapes match in a fast easy way!

Then, I switch up a Christmas project and turn it into a Valentine's Day card. I try a little humor...don't worry I won't be onstage as a comedian any time soon!

Hope you had a wonderful weekend, thanks for taking time out to stop by today! Hope you get a chance to catch the show and these simple but fun projects!


Tuesday, October 20, 2015

Second show for CRAFTober!

Fall is just going by so fast! CRAFTober is halfway through and it's time for a new show!

Our first guest is Jenny Floro who shows us how to make some festive wreaths really quickly! Here's a Fall version using some fun burlap ribbon.

Then, she showed us an idea for a Christmas wreath using some traditional colors and the ever popular Chalkboard ribbon!

What? You still haven't made your Halloween costume yet? No worries, Erika from Pearl City BFC has a great idea for you! Be a Trendy Pineapple!
 
Then, we welcomed back Kelli Acopan to the show! Kelli is now teaching card making classes at the Mapunapuna BFC and she showed us how to put together a cute Halloween Shaker card!

Thanks for stopping by today and I hope you having a Crafty month!


Thursday, October 1, 2015

Woo Hoo! CRAFTober is finally here!

Growing up, I always referred to October as ROCKtober since I love almost all forms of music but especially Rock! Then, about 13 years ago, it really sunk in to me that October is also CRAFTober! 13 years ago on October 20th, the Joy of Crafting premiered on OC16. I remember that day because 1) it was the one year anniversary of my first date with my Hunny. 2) I was sick with a bad head cold and all stuffed up hugging my Kleenex box. So, I barely could keep my eyes open as I watched the show that night.

 
I still get very excited when the 10th month rolls around. So, my fellow Crafties, it's time to get yourself all gussied up and ready for a FUN month! Be sure to "carve out" some time to stop by our stores to see all the Crafty Holiday Happenings!

 
And what more fun way to start CRAFTober than with this Saturday's World Card Making event at all of our HouseMart Ben Franklin Crafts Stores from 10 am - 12 noon.


In the first hour, we'll be demoing the Sizzix Big Shot and show you how to die cut, emboss and use the new ink sheets! We also have a Shaker Card Make and Love using the WeR Fuse for just $3!


Then, from 11am - 12 noon , we'll be doing two Make and Loves! A cute Noteworthy Card that includes a pocket for a little notepad for $4. This one is great for adding bags of M&M's or other treats, too!


The second project is a Foldover Gift Card Holder for $3. The great thing about these cards is you can use the designs for different occasions all year long!

Hope you can stop by and join us this Saturday! Have a great CRAFTober!

Sunday, May 17, 2015

Our second show for May!

Lots of new and talented friends on our second May show! We start the show with a two-time winner of our We Love Crafts weekly contest!
Micah Torigoe is a young and talented card maker! A lot of you will envy his Copic coloring style,too.
On the show, he'll use Sister Stamps' Pua to make a sweet Congratulations card.

Next, we have the crew from the Hawaii State Library System tell us what is in store for this year's Summer reading program. The theme is everyday Heroes and Super Heroes!
 
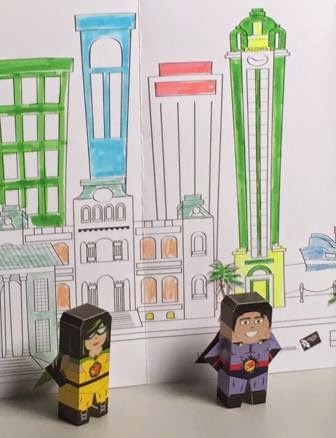
This Super Heroe craft kit is one of the incentive prizes keiki can get for reading a book every week! HouseMart Ben Franklin Crafts and Ace Hardware stores across the state will be visiting the different libraries, sharing Hardware Science and crafts!
 
Another event we participate in during the summer is Relay for Life. On Oahu, we'll be at the Magic Island relay which will be on Saturday, July 18. This year, it's only six hours long from 6pm to Midnight. Hope to see you there!
 
We will be helping people with the Luminaria, which is what Erwin Saenz from the American Cancer Society made on the show.

Thanks for stopping by today and I hope you're able to catch this show! Have a great week!


Sunday, September 22, 2013

September's second Joy of Crafting Show

We're on a roll with more fun crafts in our second Joy of Crafting show for September!

Catherine is back with another project using The Crafter's Workshop stencils! This time she's making cards! Wouldn't that be cool to make a T-shirt and then wrap it up and attach a matching card?!

Our next guest represents an idea I've had for some time. I know a lot of crafters are so talented they should start a business, so from time to time we'll have guests on to share some tips on how to turn your hobby into a business. For our first Crafting Business tips segment, we have Trini Abaya-Wright from Central Pacific Bank. She shares some basic but important things you should know when you're first starting your venture.

Lastly, I'll help you get ready for the Holidays with a simple favor box you can make to use for Bosses' Day, Halloween, Christmas, basically any occasion!

Thanks for stopping by today and Happy Crafting!

Monday, February 11, 2013

14 Days of Valentine's Day 5 - LOVE Card

So, here we are on day 5 of the 14 Days of Valentine's. Time to make a card for someone special!

Here's a really fast card to make.To keep it simple, we used dies from the Sizzix Pop 'n Cuts line.

Here's the base Pop'n Cuts die with the "love" die insert.

And the matching Love Sizzlet set. The Love wording is the perfect match to the insert die and leaves just a tiny border.

From printed cardstock, I cut out a card without the insert for the base(left). Then, I put the insert in and cut out the card from solid cardstock (right). Follow the instructions on where to fold to create the pop out.
 
Then, I cut out part of the card base in the printed cardstock again. Flipped it over and cut out the "love" from the Sizzlet die.

I stamped the birdie design on white cardstock and cut him out. Ithink his heart wing matches the paper perfectly. I color in his wing with a marker. I also cut a few hearts from the printed cardstock.

I cut a strip from this cardstock for the front of the cars and I also used some of this silver glitter tape.

Here's the front of the card with a strip of the heart paper and two strips of silver glitter tape.

Attached the pop-out card to the inside. Glued the "love" onto the cardstock love pop out. Glued the heart paper pieces to the top and bottom of the card. Added a strip of glitter tape above the bottom heart paper piece. Added the cut out hearts. Added the stamped birdie to the top of the pop out using pop dots.

Thanks for stopping by today and I hope you're having a great week!