http://www.blogger.com/
Showing posts with label origami. Show all posts

Sunday, August 16, 2015

August's Second Show

It's time for another new Joy of Crafting Show! We start off the show with a new guest crafter! Joel Kutaka from Celebrations introduces us to their newest teacher!

Shiho Matsuda does some beautiful origami style wrapping and other projects.
 
On this show, she shows how to make an awesome origami pop up box/card embellished with a handmade flower. Look for future classes with Shiho coming up at Celebrations!

Next, we have our fun friend Kelli Taylor from Tierracast share another bracelet kit. This one uses different techniques like setting rivets.

And then we have Deena Zieglar back to share even more cool new things from Sizzix like Ink Sheets!

Hope you enjoyed your Summer, the days seem to be going by so fast! Hope you can catch this show, Happy Crafting!


Wednesday, November 26, 2014

November's Second Show

Wow! The holidays are just sneaking up so fast! Currently on the show, we have some wonderful holidays projects!

Celebrate with Timeless Traditions! Diane from Mapunapuna Ben Franklin Crafts puts together a colorful festive wreath in bright reds and greens. She's always so amazing!

 
It wouldn't be the holidays without Joel from Celebrations. This time he and special guest, Bryan Odo, show us how to use the origami kusudama flower to make an ornament! So, cool!

Then, Jenny Floro gets us ready for the Holidays with beautiful tablescaping ideas!

Thanks for stopping by today and I hope you're enjoying the holiday season!

Monday, July 21, 2014

Second Joy of Crafting for July!

Here's what's on the second Joy of Crafting show for July! We had fun with our guests and their crafts!

Joel from Celebrations is back with a really creative and useful project, washi decorated notebooks! BTW, Celebrations will be having a "Washi Bombing" event the weekend of Aug 9 and 10. A fun day of washi madness, come and help "bomb" their wall with washi! Check Celebrations for more details.

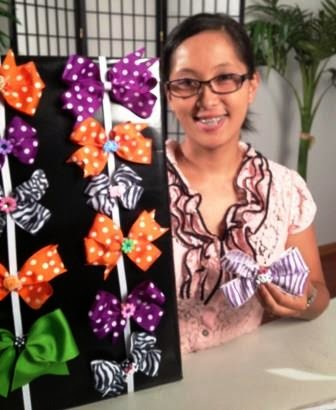
Then, we have Jamie from Pearl City BFC teach us how to get ready for Back to School with one of the hottest trends, Rah Rah Ribbon Bows! It's not just for cheerleaders!

 
Lastly, I do some re-purposing by making origami baskets from old magazine pages! These are great for snacks or using at parties to put boiled peanut shells. We even have a project sheet, too!

Summer seems to be going by so fast! Thanks for stopping by and I hope you get a chance to see this episode! Have a great week!

Monday, February 10, 2014

14 Days of Valentines - Day 9

****OOOPS, Sorry, forgot to hit publish so this is yesterday's project!

For Day 9 of the 14 Days of Valentines, we have some thing that's the same but different!

I love origami that's easy, so here goes! Start with a paper 4.25" x 8.5"

Fold in both sides to the center. Crease well.

From the top, fold down 2". Crease well.

Flip the paper over to the other side. Fold the top corners down to the center. Crease well.

Flip the paper back to the other side. It should look like this.

Fold the top point down to the back. It should create a small pocket.

Here's a side view with the point on the other side and the pocket formed.

At the top, snip at the center point about one third down.

At the top, fold the corners in on each side. Crease well.

At the bottom, fold in each corner to the center. Crease well.

Roll the paper and tuck the bottom point into the pocket.

Slip in a napkin. This is the matching napkin ring for your chopstick holder. See, same but different!

Thanks for stopping by today and hope you had a wonderful weekend!

Saturday, February 8, 2014

14 Days of Valentines - Day 8

Are you starting to  wonder what you're going to eat for Valentine's dinner..hmmm maybe Japanese? Well, today's project would be perfect for that!

All you need is a square sheet of paper 4.75" x 4.75". I found this cute heart print wrapping paper at the Celebrations store. Take the paper and fold it into thirds.

I usually roll it into thirds and pinch the ends to mark where I have to fold. Then, I refold it and crease it nicely. Unfold.

Fold the bottom right corner to the center, crease well.

Repeat with the left bottom corner. Unfold.
 
Fold in the bottom right  corner to the creased line. Crease well.

Repeat with the left corner.

Fold the right side flap in and align to the one-third crease fold. Crease well.

Repeat with the left side flap.

Fold in the bottom right corner to the center. Crease well.

Repeat with the left bottom corner. Crease well. You can see the heart taking shape now.

Turn the whole piece over.

Fold in the right side to the center. Crease well.

Repeat with the left side.

Turn over. Now, you can really see the heart shape.

Pick the piece up and tuck the straight edge into the back of the heart.

Ta Daa! Your heart is complete! What's it for?

It's a chopstick rest!

Although you think there are a lot of steps because of the number of photos, there really isn't. I just like to show the before and after each step. Thanks for stopping by today and hope you're having a Fun Saturday! Hmmm...maybe I'll have Japanese food tonight?

Monday, February 11, 2013

14 Days of Valentine's - Day 8 Origami Heart

The weekend is here so you might be eating out. Let's spread a little Love this year by leaving Heart shaped tips!
Fold a dollar bill into a heart and leave this the next time you eat out or want to thank someone for a job well done!

It's not hard because the folds are repetitive. Here'a a link to a project sheet, the paper size is the same as a dollar bill.

Have fun practicing! Thanks for stopping by today and have a great weekend!